How do I build my place?: Difference between revisions
mNo edit summary |
No edit summary |
||
| Line 21: | Line 21: | ||
Then, go to File > New to create a new place. Or, if you've already made a place and saved it, go to File > Open and then select the .rblx file of the place. It may have a Roblox logo, but don't let that fool you! You can still open it as a place. | Then, go to File > New to create a new place. Or, if you've already made a place and saved it, go to File > Open and then select the .rblx file of the place. It may have a Roblox logo, but don't let that fool you! You can still open it as a place. | ||
[[Image: Howtocreateaplace.png]] | |||
== '''How to Create the Base of your Place''' == | == '''How to Create the Base of your Place''' == | ||
| Line 27: | Line 27: | ||
When creating a new place, it will send you to this: | When creating a new place, it will send you to this: | ||
[[Image: Newplace.png]] | |||
Do not be afraid! You have not entered the Matrix! You simply have '''completely nothing'''. To fix this, simply go to Insert > Object. Then, you will get this screen: | Do not be afraid! You have not entered the Matrix! You simply have '''completely nothing'''. To fix this, simply go to Insert > Object. Then, you will get this screen: | ||
[[Image: Insert.png]] | |||
| Line 39: | Line 39: | ||
== '''Understanding the Toolbar''' == | == '''Understanding the Toolbar''' == | ||
[[Image: Toolbar.png]] | |||
| Line 70: | Line 70: | ||
#Various Weld/Hinge Tools - Not necessary for beginners, rarely used for anyone else. | #Various Weld/Hinge Tools - Not necessary for beginners, rarely used for anyone else. | ||
#Various Camera Movement Tools - Not needed, you can move the camera via WASD and scrolling. | #Various Camera Movement Tools - Not needed, you can move the camera via WASD and scrolling. | ||
If it is in bold, it is important. | |||
Revision as of 14:06, 22 June 2020
|
Using GOODBLOX Studio
To use the GOODBLOX Studio, navigate to wherever you put the GOODBLOX client folder. If you cannot find it, please do not ask us for help. That is on you. After you have opened up your GOODBLOX folder, run RobloxApp.exe. Disclaimer: if it does not run on the first time, it doesn't mean it won't run on the second, third, fourth or even fifth time. PLEASE do not ask an admin about anything that can be easily resolved.
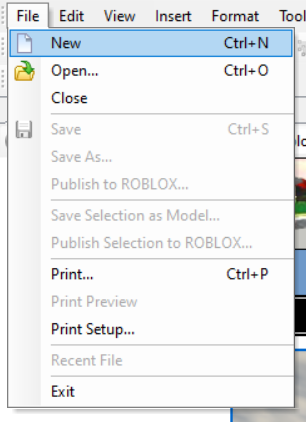
Then, go to File > New to create a new place. Or, if you've already made a place and saved it, go to File > Open and then select the .rblx file of the place. It may have a Roblox logo, but don't let that fool you! You can still open it as a place.
How to Create the Base of your Place
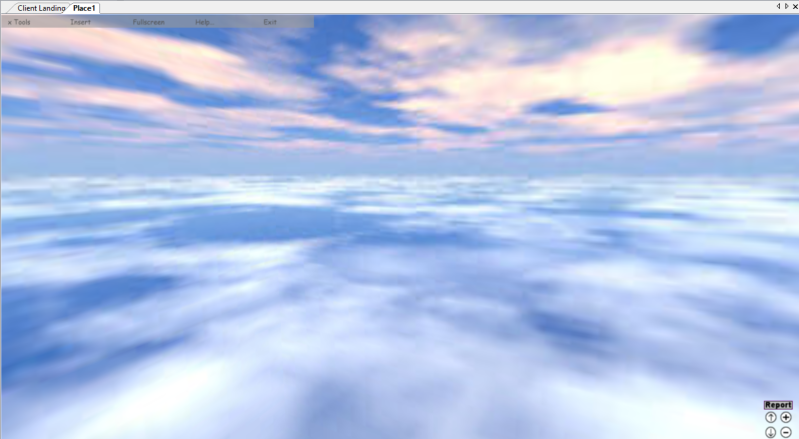
When creating a new place, it will send you to this:
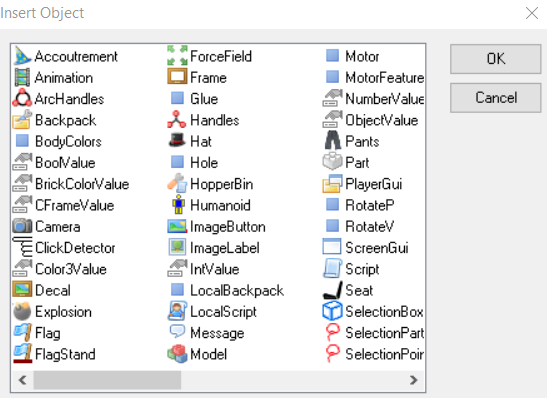
Do not be afraid! You have not entered the Matrix! You simply have completely nothing. To fix this, simply go to Insert > Object. Then, you will get this screen:
At first this may seem overwhelming, but it is actually extremely easy. Simply click "Part" on the third coloumn and then "OK". And there you go! You have your first part! You will do great things with it, I promise! The part should be right in front of you, and you can resize it according to the type of game you want to create. I suggest using CTRL + D to duplicate bricks, as inserting bricks over and over, especially in a big project, can be annoying and hurt your wrist.
Understanding the Toolbar
- New place - Instead of going to File, then New, you can press this to instantly make a new place. Useful if you need to test something out of your main place.
- Open place - Instead of going to File, then Open, you can use this to open place files and models.
- Save place - As the GOODBLOX Studio currently doesn't have autosave, I recommend you use this regularly to prevent a crash causing you to lose hours of progress. Trust me, it hurts.
- Cut - You can use this tool to both copy an object, but also delete it. Copying is more recommended than this.
- Copy - Copy the currently selected part/s.
- Paste - Paste the previously copied part/s.
- Undo - Undo any previously completed action.
- Redo - Undo anything you have undone.
- Group - Group a selected amount of parts into one. You can use this to upload models onto the GOODBLOX website, for others to use.
- Ungroup - Removes a group and puts it back into individual parts.
- Rotate - Rotates a part.
- Tilt - Tilts a part.
- Move Up - Moves a part up.
- Move Down - Moves a part down.
- Run - Runs a place as if you are playing it.
- Pause - Pauses, but doesn't stop, the currently running place.
- Reset - Stops the current place from running.
- Drag/Select - Selects a specific part. You can use this to select multiple parts by holding CTRL while selecting.
- Move on axis - Lets you move parts using an XYZ axis. More recommended than move up and move down.
- Resize - Allows you to resize a selected part.
- Lock - Allows you to lock a part, making it so that nobody can select it in-game.
- Anchor - Allows you to anchor a part, making it so that it cannot move on its own.
- Paint - Allows you to change the colour of a part.
- Pick Colour - Allows you to pick a colour based on whatever part you choose.
- Change Material - Allows you to change a part to a range of 8 different materials.
- Various Weld/Hinge Tools - Not necessary for beginners, rarely used for anyone else.
- Various Camera Movement Tools - Not needed, you can move the camera via WASD and scrolling.
If it is in bold, it is important.


